Showing posts with label Organizing. Show all posts

Tuesday, February 12, 2013

Trick of the Trade Tuesday–Photo Gallery Organization Tutorial

Photo Gallery Planning Tutorial

2 weeks ago, here, I shared that I like to layout my photo gallery plan in Microsoft Publisher. I figured I’d give you a step by step of how I did it. Perhaps slightly embarrassing to admit how OCD I am, but…I know I’m not alone.

Step 1

Measure all your picture frames and the area of wall you hope to hang said photo gallery.

(if you’re OCD like me, measure the size of the mats, too, so you can really get a visual of what the whole she-bang will look like).

Step 2

Open Publisher and change the View to about 25% (more or less depending on how large your wall area is). Click the View tab, and change the percent to 25. It will then look like this.

image

Step 3

Create a shape the same size as your wall space. Mine was huge, about 42” x 85”. Click the Insert tab, Shapes, and my wall space is a rectangle. Change the measurements in the upper right corner to match your wall space. See? Because mine was so large, I changed the view to 10%.

image

Step 4

Begin putting in the size/shapes of your frames. So, for example, one of my frames is 10x12, the mat was 8x10, and the frame opening 5x7. I put in a rectangle to be 10x12, filled in black. So, Insert, Shapes, rectangle, adjust the measurement. Next, click Format, Shape Fill, black.

image

Then, I added another rectangle that was 8x10, Format, Shape Fill, White, and centered it in the middle of the first “frame”, and wa-la! You have your first “matted frame”.

image

Then, add your picture in a 5x7, center it, and you’ve got your first framed picture!

image

To keep that whole picture entact, use your mouse and select all 3 layers, both rectangles AND your picture. Then, from your home tab, click group. Now you can move the whole image together. See?

image

Step 5

Continue this process until you have all your frames and pictures. Don’t worry about placement just yet, you can move it out of the “wall space area” until you’re ready to lay out your frames in the gallery design you’d like.

Step 6

Now, toy with what pictures you want where, and where you’d like each frame placed. It helps with color layout, etc. It seems like a lot of work getting it set up, but now, each time I want to put in new pictures, I can just add the picture in the correct size, and see how it fits. Does the color mesh with the others, etc. Easy peasy. Let me know if you have any questions and I’ll try and answer!

image

Enjoy your new gorgeous photo gallery!!

Tuesday, January 29, 2013

Trick of the Trade Tuesday

arranging pictures for a photo gallery

Photo Gallery 2

Okay, okay…I realize this is MAJORLY OCD. But, it makes me eerily giddy! And my photographer said she loved that I did it, so that has to say I’m somewhat normal, right? Winking smile

We all have a photo gallery somewhere in our homes, right? Well, how often do you print out a picture, only to find it either doesn’t fit the feel of your space, or the opening in the frame itself?

What I’ve started doing is arranging my frame layout in Microsoft Publisher, but you could also do it in Word. That way, I have all the sizes to the openings of the frames saved and ready to look up when I’m ready to swap out photos.

The other bonus is I can arrange the pictures to see how I like them best. How the colors play with each other, how they look altogether, etc. I have two “galleries” that I’ve done this with so far. The first one, up above, is the layout that I have above my couch in my living room. And yes, I even measured the mats, etc. so I could see EXACTLY how it would look. This also helps me in purchasing pictures from photo shoots we’ve had. Makes sure I put our gorgeous pictures UP ON THE WALL (instead of keeping a digital copy on my computer for nobody to ever see).

The second gallery I’ve done this with is one in our hallway, as seen below (shown that it’s actually done in Publisher).

Photo Gallery Arrangements

Let me know if you want a “tutorial” on how to do it. But otherwise, hope the tip helps you and your photo arranging successes! =)

Tuesday, December 18, 2012

Trick of the Trade–Storing Trinkets


trick of the trade #28:

storing trinkets

Storing Trinkets

This post relates to my party favor post here. I have these lovely storage bins I got on the cheaps at Costco, similar to the Expedit shelving units at Ikea! I promptly decided what would go into each bin and labeled them, with tiny pictures at the bottom so my kids remember what goes where. One of them I decided to label “Trinkets”. And since then, these little “treasures” have been far less annoying.

You know those little “treasures” I’m talking about. Your kids may have picked one up at the dentist’s office, or received them as party favors, Christmas or Halloween parties at school, probably some of your stocking stuffers (at least mine are for sure!). Here they are…What a load of...

Those toys that have no…well, place, or label they belong to. Before my little “trinket” box, I would begin to pick up around the house, I would grab these mindlessly and stand there thinking, “Where in the world?” Now…I know exactly where they go. It makes clean up waaay easier! And, these “treasures” are no longer the bane of my existence. So, bring it on party favors! =) Ready for a quick game of I Spy? Can you find these 5 items:

Slinky, Jacob’s Ladder, a broken purple Easter egg, Angels sundae hat, and a Sophie the giraffe teething toy (that’s no longer needed for teething, i.e. is now a trinket)IMG_5963

So, what are you waiting for? Go collect those “treasures” and create your own trinket bin! It’ll make you smile. And…if you can’t find an item in the trinket bin, just find your daughter’s latest hoarding run. Check her out…hilariousness!IMG_5639

IMG_5640

Friday, December 14, 2012

Friday Faves - Christmas Cards & More!


#1. christmas card books
Picture1
Free printable here. I love this way of storing Christmas cards!
#2. snickerdoodles
Snickerdoodles
…and fudge, technically, but I haven’t made the fudge yet. Each year, my grandma, who lived in Oklahoma, would make and mail snickerdoodles and fudge each year for Christmas. Two years ago, I “took over” this tradition and mailed them to my dad and brother. It doesn’t feel like Christmas yet until I’ve had these two sweets. Click here for the recipe I use.
**Quick aside…my dad just flew back this week for my grandma’s funeral. Family dynamics can often be…tricky, and odd. But, all that aside, each member of your family makes an imprint on your life whether you want to admit it or not. Think about the imprint you’re leaving. Thanks Grandma Roach for this sweet tradition.
#3. neutrogena makeup remover towelettes
Makeup Remover
I HATE getting ready for bed. I’ll postpone it, just because I don’t want to go through the routine of “getting ready for bed” i.e. brushing/flossing, retainers, removing contacts, removing make-up, taking daily medicine, lotion…anyone else exhausted yet? Anyhow, I am far from consistent when it comes to taking off my make-up (okay, you can close your mouth from gasping now). BUT, since I’ve bought these bad boys, I’ve been much more consistent! I also use their eye makeup remover, works great!
#4. grace
grace
This last one may seem silly, and it without a doubt falls into the last but CERTAINLY not least category. Being sick with mono, and having a 4 year old and a 21 month old, my patience is often thin. I will admit to having made the Marge Simpson frustrated noise with my children in the middle of chaos. And I will admit to flat out snapping out in irritation. If you’re a parent and this has never happened…well, you’re probably lying.
BUT, the grace of God allows me to seek forgiveness and start anew without harboring all these wretched feelings of guilt. Am I stricken with guilt? Yeah, but there’s no reason to harbor that guilt once I’ve asked forgiveness and have moved on with the intent to improve.
Thank you God for this. You, more than anyone, know I need it.

Tuesday, December 4, 2012

TOTT #25–Luggage Tags

Free Printable Logo

I’m excited to share this one with you for SO many reasons!

#1 – They make me smile every time I see them.

#2 – It’s perfect for this season! Traveling, and gift giving.

I made these luggage tags as gifts a few years back for Christmas, worked great as stocking stuffers. I have the “I heart Baggage Handlers” on my HUGE suitcase and my “I could fly first class if I wanted to” on my carry on luggage. And now that I’m re-visiting them, I’m pretty sure I need to print out an “Are we there yet?” one for my son’s carry-on. Every time I travel, they make me smile. And I think they would make the airline workers chuckle, knowing they’re appreciated as they “toss” my pushing-the-free-50lb.-scale bag onto the plane. My husband (you know, the glass half empty in the relationship?) says yeah right, instead of chuckling they probably give it a good bang on the side of the plane before “tossing” it in. Winking smile Either way, they make me smile, and provide important information lest my bag be misplaced.

So, here are your free printables! Feel free to attempt to line them up and print back to back. I just do it old school style, print them both out, cut and glue ‘em together. Just seems faster. I included a bag of zip ties with the stocking stuffer, something similar to this.

Front of Luggage Tags

Back of Luggage Tags

Probably the easiest thing to do would be to add the image to your document, put a text box to include your info, then print.

And here’s one more for any of you shoe lovers!

Girl Luggage Tag

And, I’ve never asked my readers this before, but if you decide to use them, do me a solid and leave a message. It’s always nice to get feedback! =) Happy, smiling traveling!

Tuesday, November 27, 2012

TOTT–Airplane Gifts

Airplane Goody Bags Traveling…with kids…we’ve ALL been there (and if you haven’t, you’ve at least observed it)! I often wonder why people aren’t more, shall we say, thoughtful? understanding?

This fun little idea was inspired by my mother to help some of my friends who were flying cross country with their kids. I purchased almost all of the supplies at the Dollar Store, but I’ll try and include links for some of the uncommon items. Below is an explanation, as well as the free printables to recreate them yourselves! Just click on the image to enlarge, then right click and save image as. Hope this makes traveling with littles slightly less stressful.

Step #1: Purchase all necessary toys, gifts, and wrapping. The shopping list for each group of 4 items is listed below.

Step #2: Wrap each of the items, placing the correct # label on each.

Step #3: Print and cut instruction sheets and put into an envelope for mom to reference, label with “For Mom’s Eyes Only”. They will fit in a business envelope.

Step #4: Place all the wrapped items in a bag labeled with the child’s name and deliver to the traveling kiddos. Watch a bit of stress dissolve from the parents face! =)

Inserts 1-4

Shopping List: wiggly snake: socks, yarn, googly eyes, felt, pipe cleaners, super glue (or velcro strips): Cars coloring book or felt coloring page & crayons: Pipe cleaners and small beads 

Inserts 5-8

Shopping List: party favor sized spirographs (or fun stencils), paper, writing utensils and a roll of scotch tape roll: Annie’s bunny fruit snacks and plastic pop-ups (I will admit, not the best on the plane, but you could do it at the end, and say that if they can behave until you land THEN they can play with them. They’re SO fun!): 2 silk flowers: Cars water color book (and a paintbrush if it doesn’t already come with)

Inserts 9-10 (and 2 repeats)

Shopping List: M&M’s, pretzel rods (both in ziplocks), peanut butter (I put it in a tupperware): some type of Bible story book: party favor sized spiral graphs (or fun stencils): roll of scotch tape

**Yes, I realize the bottom two are repeats, I included them in case you would rather wrap them as two separate gifts.

Inserts Girly

Shopping List: princess posters (or coloring book) & coloring utensils: princess glow-in-the-dark wand: princess stamps & stickers & paper

**I first made it for 2 boys, then for a girl. So the last one is in case you want to add some girly ones to the mix.

Numbers and Labels

And lastly – here are numbers (I put two in case you’re making it for 2 children, or if you want to put a label on each side), a label for the bag with ALL of the goodies inside (without the name so you can write it in), and a label for the envelope with all the instructions – “For mom’s eyes only”.

IMG_0588 Publisher with words

Here was Cooper all ready to deliver our goodies! He didn’t mind helping so much because he got to keep some that had extra in the package. Fun, fun! Remember, you can keep it relatively cheap – check out your Dollar Store, or browse the dollar aisle at Target or Michaels. Ironic that I have yet to do this for my kids. I think it’s for two reasons:

Reason #1: I haven’t had a long enough flight with old enough kids.

Reason #2: My kids have an attention span the size of a gnat are perfect on airplane rides! Winking smile

There you have it ladies and gents. Use some, or all! If you’ve got time, leave a note letting me know if you used them, I LOVE hearing from you!

Saturday, March 24, 2012

Laundry Room Makeover

Laundry Room - Loads of Fun

As I sat down to write this, I’ll have to admit, I doubted whether this was worth a post, and then…I began pouring through the pictures. There are a few changes that are most definitely worth sharing! First…some eye candy of the overall project.Laundry Room Recap

Let me start with the changes that are making a huge impact. Simple, yet so helpful and fun!

#1. Bath & Bodyworks Plug-inPlug in There’s an outlet above the dryer which I’ve never really used. I had an extra plug-in, so I plugged it in! I love walking into my house smelling such a yummy scent! Our laundry room is adjacent to our garage, so when we come in, that’s the first room we enter. I love this little change.

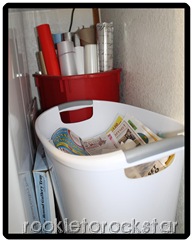
#2. Full size trash canTrash can Again, this is the first room we enter. Is it just me? Or do all of you feel like you accumulate massive quantities of unnecessary trash? Junk mail, food wrappers, etc. I had a SMALL one in here before, but I feel like I can stay more organized after coming in from the car with a full sized one now.
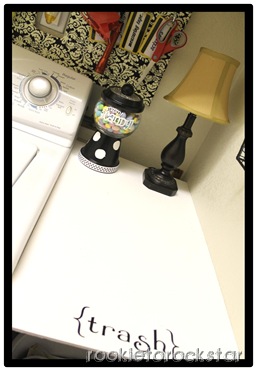
#3. Candy jar =)Candy jar First of all, this just makes me smile. We made these in our MOPS group. I like having a “pretty” laundry room. Secondly, I feel like after completing a few loads of laundry, I deserve a small treat. hehe =) So, it’s fun having a little candy jar in here.
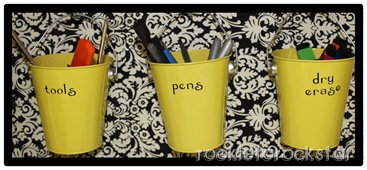
#4. ToolsTools Even though our garage is immediately adjacent to our laundry room, I hate having to go out there when I need certain necessities, aka: screwdrivers. Don’t you always need them, to replace batteries in toys? Assemble furniture? Random stuff, right? The door to the garage is RIGHT next to my daughter’s room, and it sometimes wakes her up, and sometimes…it’s just outright cold out there! So, I love having it at my fingertips whenever I need it.
#5. Dry Erase Markers

See picture above. Initially I put these in here to write on the washer what clothes needed to line dry. And I might still do that. But, we’ve found it fun to leave daddy a little note directly on the washer or dryer! We even left one for Grammy when she came to visit. How fun!

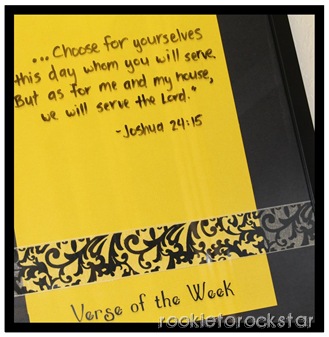
#6. Verse of the WeekVerse of the week Trying to keep my spiritual focus on a day to day basis can be challenging, but focusing on scripture is helpful. I pray a scripture each week for my children. So, I’ve started writing it on this frame. It’s such a great reminder!
________________________________________

Okay…so now that I shared the “highlights”, let me give you the nitty gritty. Of course I neglected to take before pictures, but it didn’t LOOK drastically different anyway. Just not as pretty.

Here are the changes I made:

  • Made the Laundry Loads of Fun sign, I’ll add a tutorial soon.
  • Made the Verse of the Week frame (I used black 12x12 paper and yellow 8.5x11 paper, and cute ribbon)
  • Got a new ironing board cover
  • Used scrapbook paper to cover the cupboards. We’re renting, so I can’t paint them.
  • Wrapped pegboard in damask fabric and hung. Just poke a hole where you want to hang the pegs. I’ll add a short tutorial soon.
  • Hung the following on the pegboard: Shelf to hold picture frame and dryer sheets (I realize you can keep the dryer sheets in the cabinet above, and I asked myself, why do I feel the need to have them OUT of the cabinet? Then, I realized I often have crap piled on top of the dryer and can’t open the cabinet to get the dryer sheet out. haha!!), 3 pails holding tools, pens and dry erase markers, packing tape, a flashlight, a measuring tape, and scissors (all things I tend to need on hand)
  • Pushed my washer and dryer together (there was wasted space where things feel in between the two, DUH!!)
  • Added a “shelf” (right now it’s just wedged between the washer and the wall, but I’m planning on hanging command hooks underneath to hold it in place. I cut it EXACTLY to fit, so it’s pretty snug), with a candy jar and lamp on top. The shelf is nice when folding laundry.
  • Added a full size trash under the shelf, my wrapping paper is also there, easily accessible, now it’s just hidden under the shelf
  • Added a magazine rack to hold mail
  • Hung a command hook to hold a lint brush (we have a white dog…black pants can be…challenging to say the least)
  • Last but not least? Organized the contents of the cabinets

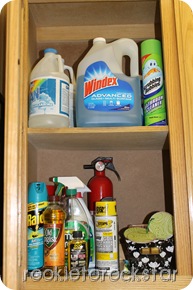
Here are a few more pictures! I always love soaking up pictures on other people’s websites for inspiration. So…here ya go!IMG_1910The contents of my cupboards:IMG_1906  IMG_1907IMG_1908IMG_1909Top left: “Refill” cleaning products and lightly used cleaning products. Refills for my scentsy products.

Top right: Toilet bowl cleaning products, Clorox wipes, soaps and plug-in refills

Bottom left: More cleaning products, and laundry essentials. Another genius tip learned from my mom (that probably most people do, I just don’t know)? Throw the lid to the detergent in with your load. It cleans it entirely. Even if it ends up in your dryer, it’ll be fine! Keeps it from getting gunky.

Bottom right: Still needs some work. Right now, it’s my iron + stuff from projects I’m planning to do soon.

Last picture!!! Here’s what I put in the picture frame. Fun, “classic” looking photo I snapped with the self timer of me and the kids playing outside. Makes me smile. =)IMG_1890 I’m slowly organizing different rooms in my home in hopes to STAY more organized, instead of feeling like I’m playing catch up all the time. In other words, I’m trying to create a home for everything. Master bathroom, my closet, and laundry room – DONE!! Up next for you all…the kitchen. Probably will make it’s debut in a week or two. =)

What do you like about your laundry room? What would you like to change?

Friday, February 24, 2012

Bathroom Organization - Drawers

My bathroom organization started with the medicine cabinet, moved onto under the sink, and ended with these beauts…IMG_0706Apart from the medicine cabinet, this was my favorite place to organize in the bathroom! It’s so functional now! I’m much more calm when getting ready. I know that sounds cliche, but it’s true!

Again, I used the scrapbook paper covered in packing tape trick to line the drawers! I just chose whatever paper I had in my stash that made me happy. =) Here’s the break down of my drawer. Again, I only kept the essentials that I use daily!! Oh, and I purchased the drawer dividers at the Dollar Tree. They may not have these exactly, but buy what you like and what will work for you!IMG_0703 From bottom left, working counter clockwise:

  • Eye shadow and eye base
  • Concealer, powder & blush
  • Chapstick & floss
  • Make-up brushes (in the pink case)
  • Glasses & case (and normally my toothbrush is along the far right side)
  • Q-tips and cotton balls (I was worried about the kidlets pulling these out, but so far so good. Although I’m sure Allie’s not far off from there)
  • Make-up remover, deodorant, contact case, prescription
  • Eyelash curler, mascara, make-up brushes, face lotion, eyeliner

And my second drawer…pretty straight forward:IMG_0702 And the hubby’s drawer (which I didn’t line ‘cuz he could CARE LESS!!):IMG_0707

  • Razor & rogaine (forgive me honey! although you’re far from vain, so I’m sure you will)
  • Shaving cream, toothpaste, floss
  • Deodorant
  • Contacts
  • around the edges are random daily use items

Ta-dah! That about covers our bathroom organization to date. Keep posted for other areas in our house! =)