Okay…so I’ve mentioned to you all that I have mono, I’ve actually had it since early August. *sigh* And I’m realizing that, well, it’s not “just going to go away” like I’d hoped. Duh!!
So, even though I was only supposed to cook TWO measly meals this past week, not-a one happened. And I am TOTALLY AND COMPLETELY OKAY WITH THAT!!
And today, instead of meal planning? I went and got a massage, ‘cuz that’s what this girl needed today! So, instead of a meal plan for this week, I will “review” what happened last week, as well as give you the recipes to the previous week (‘cuz there were some good ones!)
Let’s start with the recipes I did actually cook from last week’s post.
Chicken Tortilla Soup

Ingredients
2 onions chopped
2 - 4 oz. cans chopped green chili's
2 minced garlic cloves
4 Tbsp canola oil
*saute above together until tender
Combine the following in a large pot -
22 oz chicken broth cilantro and fried
22 oz beef broth corn tortillas
2 c. tomato juice (V-8)
3 c. water
2 large tomatoes chopped (or you can used canned tomatoes)
2 tsp cumin
3-4 Tbsp chili powder
2 tsp salt
2 lg cans corn - no juice
1 can (drained & rinsed) black beans
4-5 cooked, shredded chicken breast
Then, add sauteed ingredients, bring to a boil, simmer for 1 hour. Top with shredded cheese, sour cream, avocado, cilantro and tortilla chips of your choice! I halved the recipe, but even if you make this ginormous batch, it freezes and is delish!
**Also, a time-saving trick, I cook the chicken breasts in the crockpot during the day. I throw the frozen breasts in and cook it on high for 4 hours. It flakes apart beautifully. In fact, you can do this to cook chicken for tacos, burritos, what’s that in your speedo and throw in a bit of seasoning at the end and you’re good to go. Easy peasy!
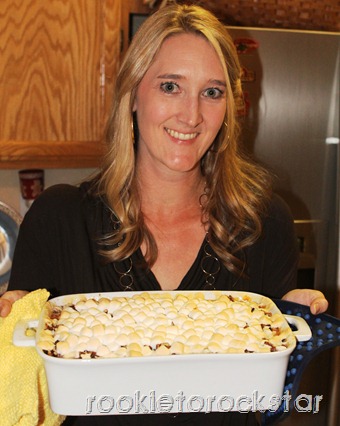
twice- baked sweet potatoes
Ingredients
14 sweet potatoes (each about 8 oz.)
½ c. sour cream
6 T butter, softened, plus 6 T cold butter
1 ¾ c. packed light brown sugar
4 tsp. fresh lemon juice
½ tsp. nutmeg
1-2 tsp. cinnamon
2/3 c. pecans, coarsely chopped
Marshmallows to top
Directions: Preheat oven to 400°. Prick sweet potatoes with a fork. Bake until soft, about 50 minutes. Let cool slightly on a rack.
Scoop out flesh, leaving a 1/2-inch border on skins. Put flesh in a medium nonreactive bowl, then transfer half to a food processor. Process until smooth; return to bowl. Stir in sour cream, 6 tablespoons softened butter, 1 cup brown sugar, lemon juice, and nutmeg. Season with salt and pepper.
Reduce oven temperature to 350°. Transfer sweet potato mixture in batches to a pastry bag fitted with a very large round tip. Pipe mixture into 12 of the potato shells, dividing evenly; discard remaining 2 shells. Filled shells can be refrigerated in an airtight container up to 1 day. Just before serving, top with remaining 3/4 cup brown sugar, the sliced butter, and pecans; arrange marshmallows on top. Bake on a rimmed baking sheet until hot and marshmallows are golden brown, 7 to 10 minutes.
OR…you can be lazy like me and just put them in a casserole dish to bake (I did about 40 minutes at 350 degrees after they’d been in the fridge overnight). They taste JUST AS GOOD and are hecka easier. 
bacon wrapped pork loin
with cherries
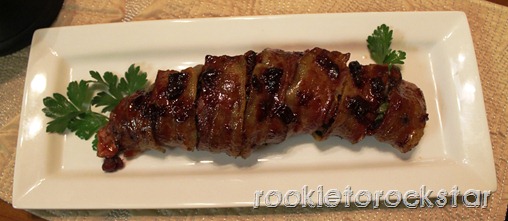
Don’t let this one intimidate you, it’s easier than it looks!
Ingredients
1 2-lb. piece boneless pork loin
½ tsp. ground allspice
Pepper
½ c. dried cherries, chopped
½ c. fresh flat leaf parsley, chopped
1 T whole grain mustard
6 slices bacon
1 T currant jelly (I used cherry preserves this time around)
1 tsp. red wine vinegar
Directions:
Heat oven to 350 degrees. Season pork with allspice and ½ tsp. pepper, place on rimmed baking sheet.
In small bowl, combine cherries, parsley, and mustard. Spread evenly over pork. Lay bacon slices crosswise over pork, overlapping them slightly and tucking in the ends underneath. Roast for 45 minutes.
In a small bowl, combine the jelly and vinegar. Brush over the bacon and continue roasting until an instant-read thermometer registers 150 degrees, 10-15 minutes more. Let rest at least 10 minutes before slicing.
To prepare and freeze remainder: (from Costco)
After covering pork with the cherry mixture and bacon, wrap it tightly in plastic wrap, place in a large freezer bag, and freeze for up to 3 months. To cook, thaw the pork overnight in the refrigerator. Gently pat pork dry with paper towels and follow the roasting and glazing instructions.
*********************************************
In case any of you are curious as to how I fed my family this past week, I tell ya, I’m a blessed girl! Here was the plan from last week, and the changes in red below:
Monday – Meal Delivered
Tuesday – Butternut Squash Risotto, Chicken & Salad
Hubby picked up Rubio’s (‘cuz I was not fit to cook!)
Wednesday – Meal Delivered (but watch my blog for a new smoothie recipe!)
I DID get that up, check it!
Thursday – Dinner out for Polar Express!
Friday – Meal Delivered
Saturday – Butternut Squash Soup & Salad
A friend delivered home-made Turkey Noodle Soup!
Sunday – Meal Delivered
God made provisions where He knew I couldn’t handle it. =) Glee!
************************************
If you’re STILL with me, kudos to you. Here’s an idea of what meal plannin’ will look like this week, ‘cuz I’m gonna have to whether I feel good or not, right?
Monday – Leftovers
Tuesday – Meal Delivered
Wednesday – Butternut Squash Risotto, Chicken & Salad
Thursday – Chard, Chicken & Potatoes
Friday – Spaghetti & Broccoli
Saturday – Slow Cooker Sweet and Spicy Asian Pork Shoulder
(I know, I know, sounds advantageous, but it has bok choy in it, and we’re getting some in our Farm Fresh to You delivery!)
Sunday – Warm Fennel-and-Parmesan Dip, Chicken & Salad
Stay tuned to see how this week goes! =)





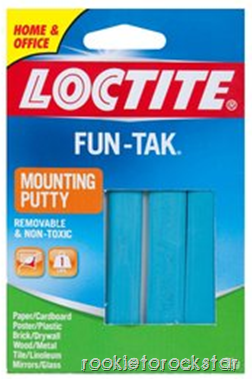
 Then, when I was an RA in college, holy moly did this come in handy hanging posters galore! And finally, most obviously, my teaching career. But, I do still use it periodically. Birthday parties, holiday décor, etc. Basically, it kind of works like you would imagine gum would, but it won’t ruin whatever it use you’re sticking it to. You do have to heat it up to get its sticking power to work. I wasn’t sure it would actually hold the two keychains together, but so far its held up for almost 3 weeks now ON my set of keys! Yay! Basically, I just heated some up, put it on the back of one keychain, and smashed them together.




 In a medium bowl add flour, oat bran, cocoa powder, baking powder, baking soda and salt. Mix. (Or have your kids mix
  )
)


 Either way, they make me smile, and provide important information lest my bag be misplaced.


